STAFIX®GRIP
STAFIX®GRIP is a glue-free sticker material that adheres to various clean and very smooth surfaces with a silicon adhesion layer. The material is removable without leaving any residue and reusable even up to 12 months.
Choose a printing technique
Click the printing technique to see the details
| Product | Printing compatibility | Appearance | Sheets mm x mm | Reels mm x m |
|---|---|---|---|---|
 Offset Offset | Traditional Offset, Oxidate, UV and UV-LED | White and clear | 450 x 640 white 707 x 1000 white 707 x 1000 clear | |
| Eco-solvent, UV, UV-LED and Latex | White and clear | 1370 mm x 30 m 1370 mm x 100 m 610 mm x 5 m (Test reel) |
||
 Toner Toner | White and clear | 320 x 450 | ||
| White | 320 x 460 530 x 750 |
STAFIX®GRIP is a great choice whether you need short- or long-term advertisement campaign solutions
The material is quick and easy to install. STAFIX®GRIP has an extra grip to it making it ideal choice for short- and long-term advertisement. The Grip is your choice when you need a stronger adhesion or to place, replace and remove your stickers a bit more. Our customers use the material in various applications in retail advertising to promote their products on wide range of surfaces such as:
- Glass – especially on top of fridges and freezers
- Store decoration and window display
- Events and exhibition/trade show advertising
See our references to find out how our customers have utilised STAFIX®GRIP in their advertising. Want to test the material? Order our free sample folder to see and test the whole STAFIX® product range yourself. 
 STAFIX®GRIP is a glue-free sticker material that adheres to various clean and very smooth surfaces with a silicon adhesion layer. The material is removable without leaving any residue and reusable even up to 12 months. STAFIX®GRIP adheres to various clean and very smooth surfaces, such as: glass, plastic, stainless steel, aluminium, tiles, varnished wood. Thanks to the material’s versatility, it can be used in various applications, such as:, Retail advertising (e.g. freezers and -fridges), Store decoration and window display, Events and exhibitions.
INSTALLING STAFIX®GRIP
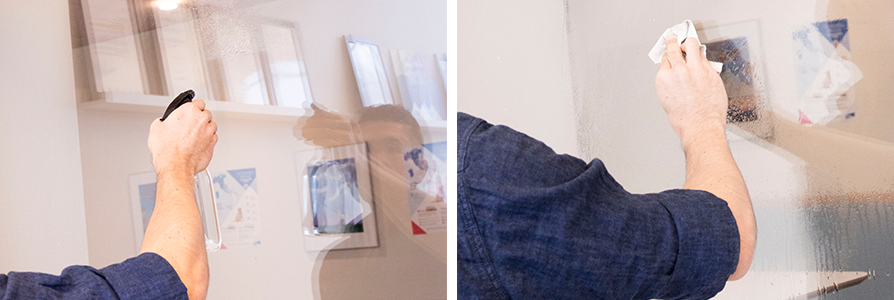 1. Make sure the surface is clean. If needed clean the surface but do not use detergent or chemicals. Wet installation* is recommended to eliminate possible air bubbles more easily. Apply the film always from the unprinted side.
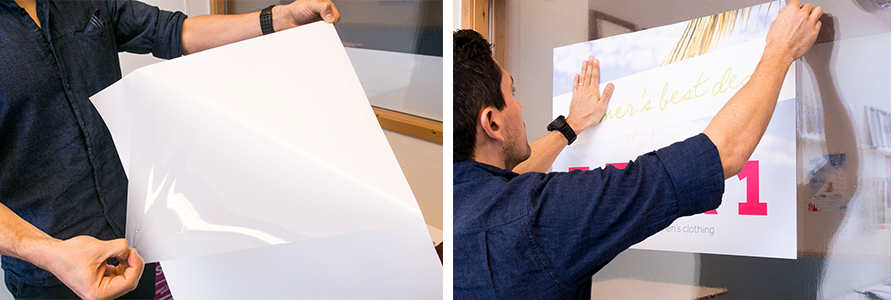 2. Release carefully the liner (see other side for details) from the face of the film, and apply the upper corner to the surface where the artwork will be displayed. After the material is aligned, remove the liner working from the top to bottom.
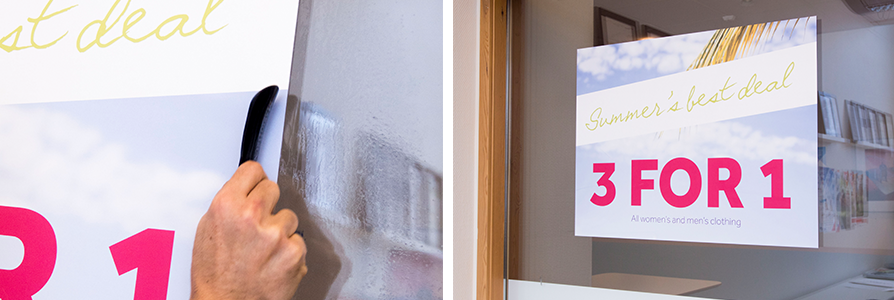 3. Use a soft sided felt squeegee to eliminate any air bubbles. Do not use of bubble popper tools or sharp objects to eliminate the bubbles.
MIRROR-WISE PRINTED STICKERS

If you want to display the image through a glass window from inside to the outside (Shop display) use the clear film. The film is printed ‘mirror-wise’ as only the unprinted side adhere to the glass. The film will stick on the inside of the window with visibility from the outside.
WET INSTALLATION
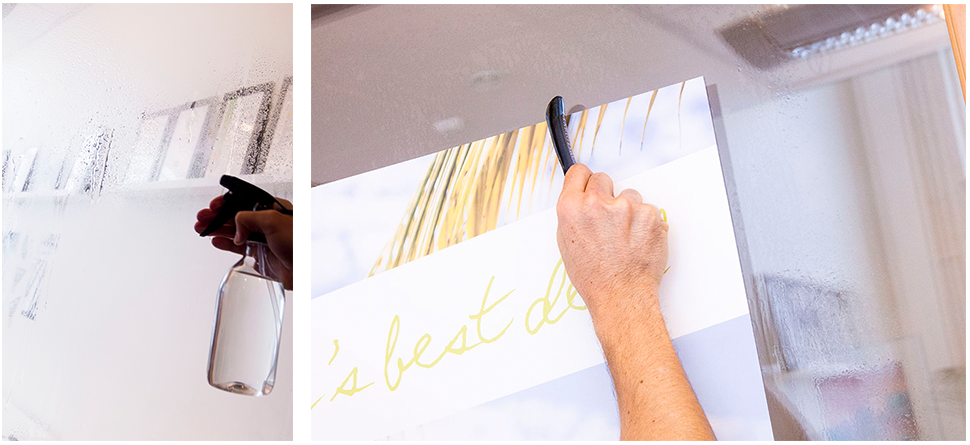 Wet installation makes the artwork easier to move and replace without damaging it during the installation process. First, make sure the surface is clean. Wet the clean surface with a spray bottle using only water as chemicals might effect on the adherence. Place the desired artwork to the surface and use a soft sided felt squeegee to eliminate any air bubbles. Remove the excess water moving from the center of the artwork to the sides. Wipe the excess water off with a paper towel.
REMOVING THE LINER
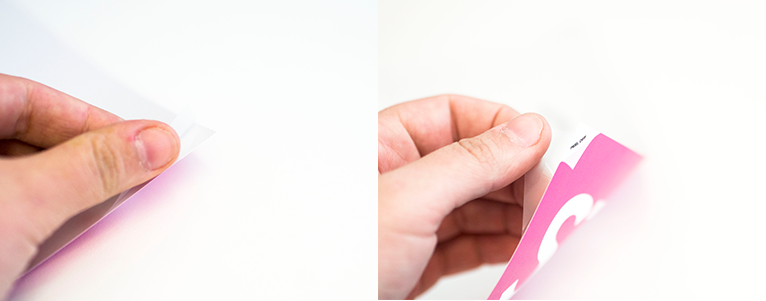 The liner is removed from the backside (from the unprinted side). Use the tip of your thumb instead of your nails.
 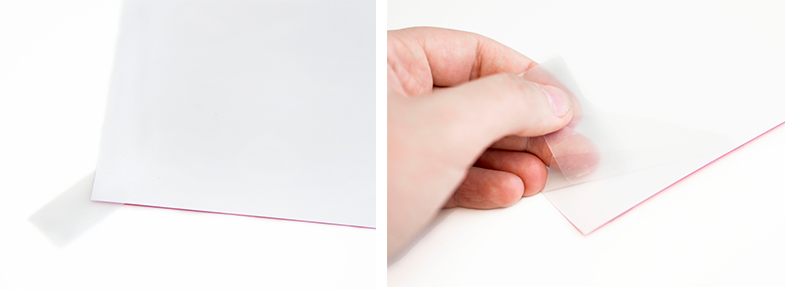 You can also remove the liner with a small piece of tape. Place the tape on the corner of the artwork’s liner and pull the tape back so that the liner comes off.

